The boulder was exactly where I did not want it: wedged beside a fence, close to landscaping, and too heavy for my AGT H13 mini excavator to handle comfortably. I did not need rubble. I needed one clean break.
That constraint changed the problem. Instead of asking “How do I destroy this rock?” I asked, “How do I persuade it to split where it already wants to?”
The rock was too big — but only barely
The excavator could expose it, push it, and test it. But controlling the whole boulder would have put a compact machine in an uncomfortable position: too much suspended weight, too little margin, and a fence within swing radius. The machine was telling me to divide the load before trying to move it.
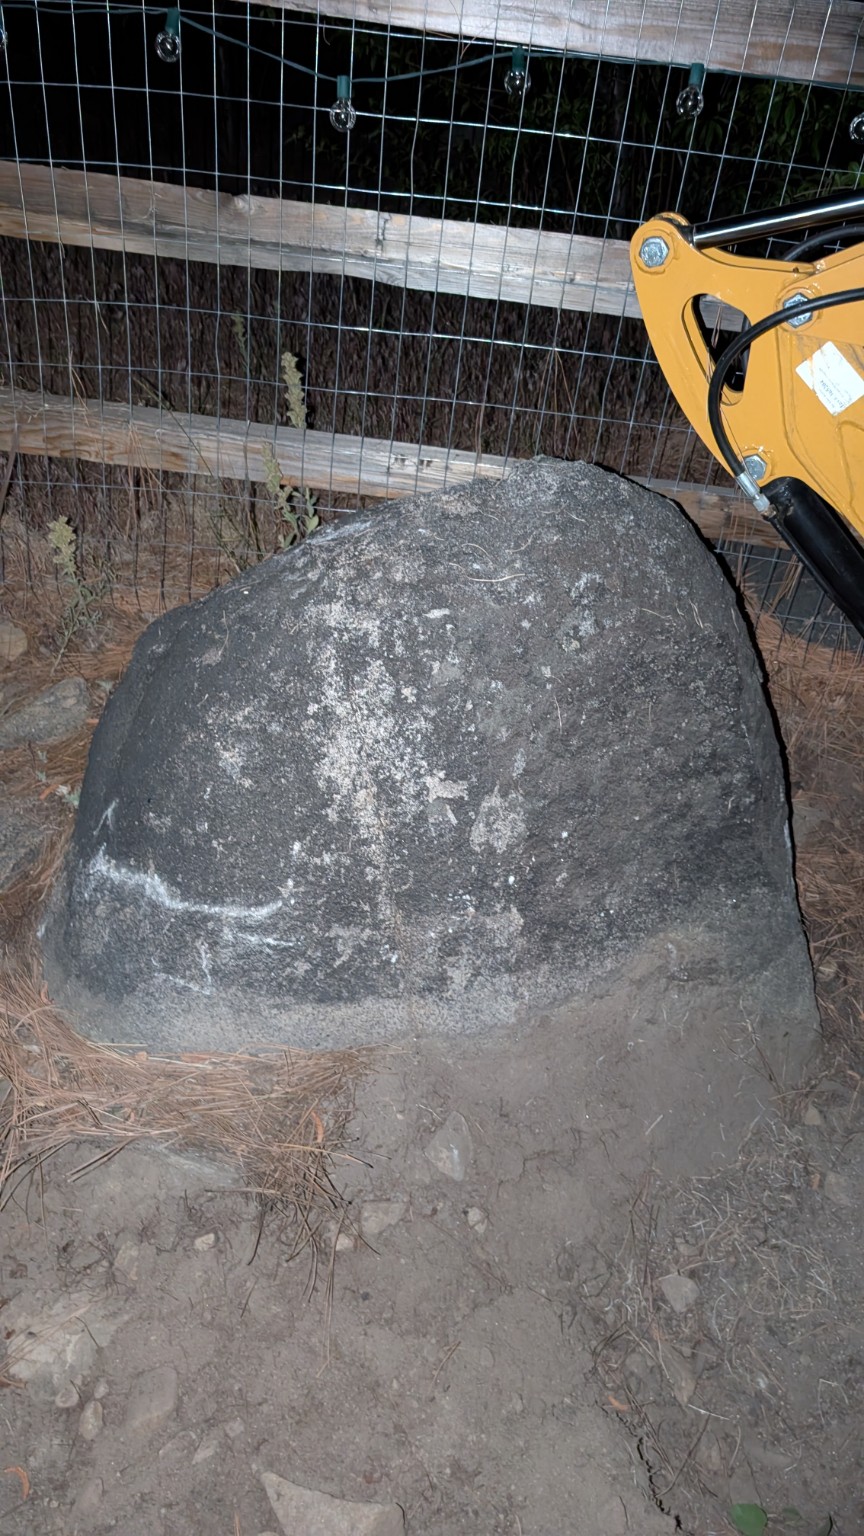
Finding the rock's preferred failure line
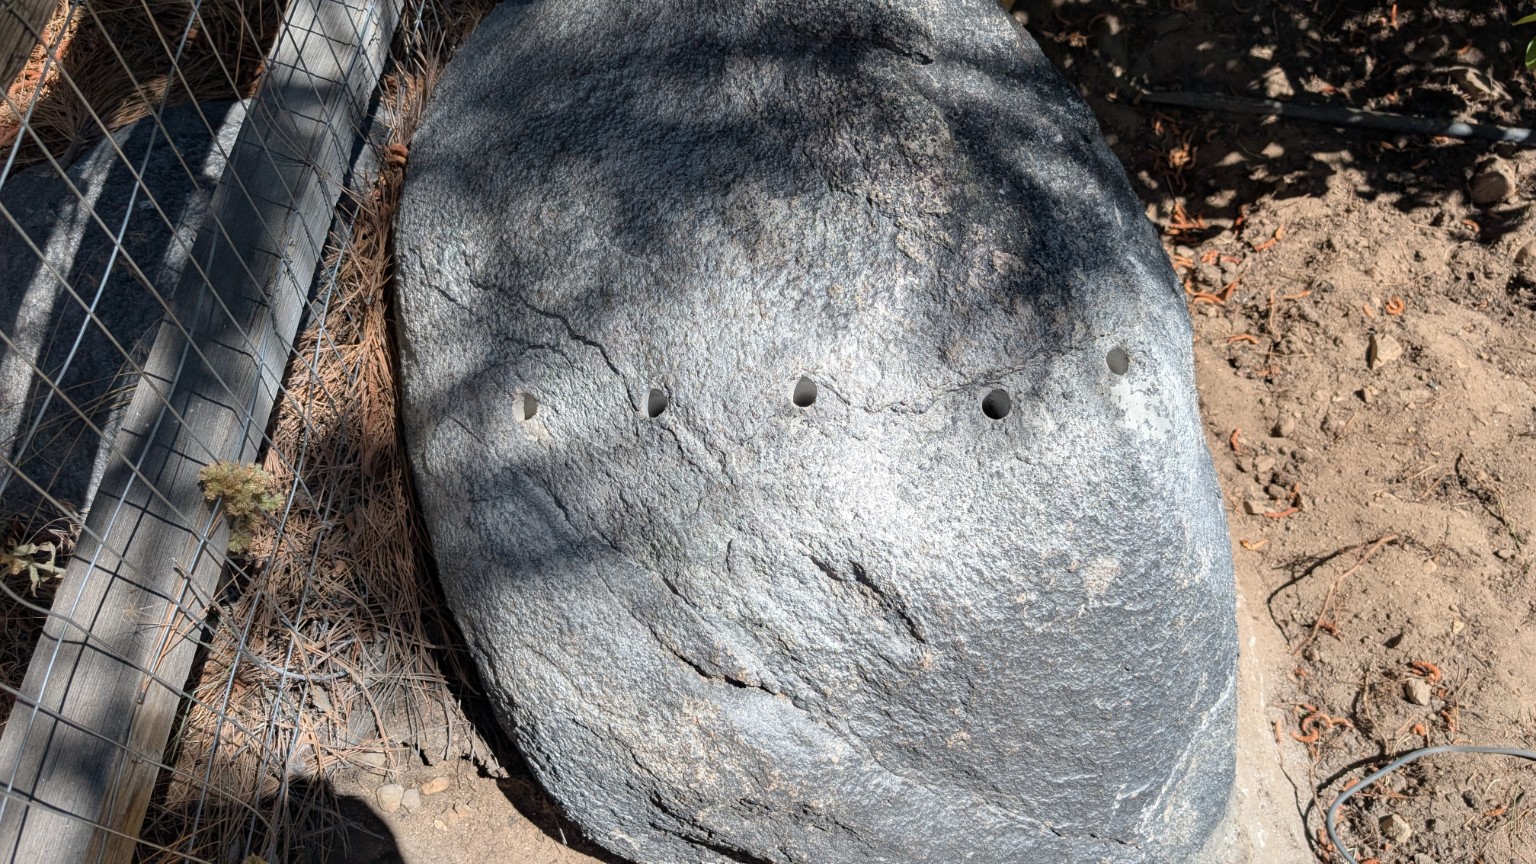
Granite looks monolithic until you study it closely. This boulder had subtle veins and a natural surface fracture running across the top. Rather than impose a perfectly straight cut, I used that weakness as a guide. The final drilling line curved slightly with the stone — the rock chose the path, I just made it inevitable.
The tool chain
The project was a small system, and every tool only had to do the one thing it was best at. The Bosch Bulldog and the long Milwaukee masonry bit created the geometry. A Makita drill with a mixing paddle blended the measured Dexpan and water. The excavator exposed the stone and would later supply the leverage.
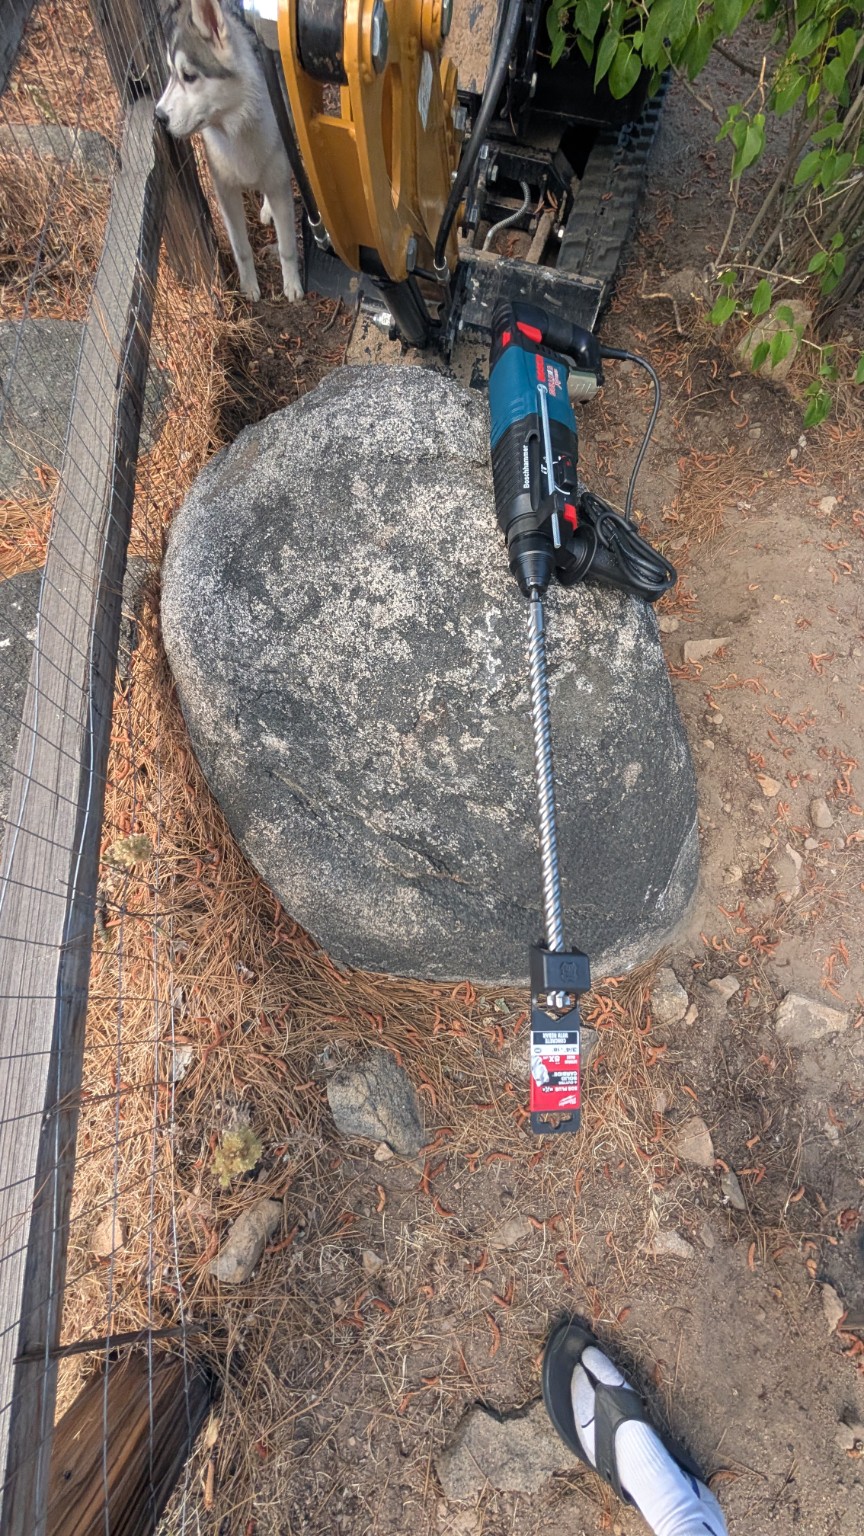
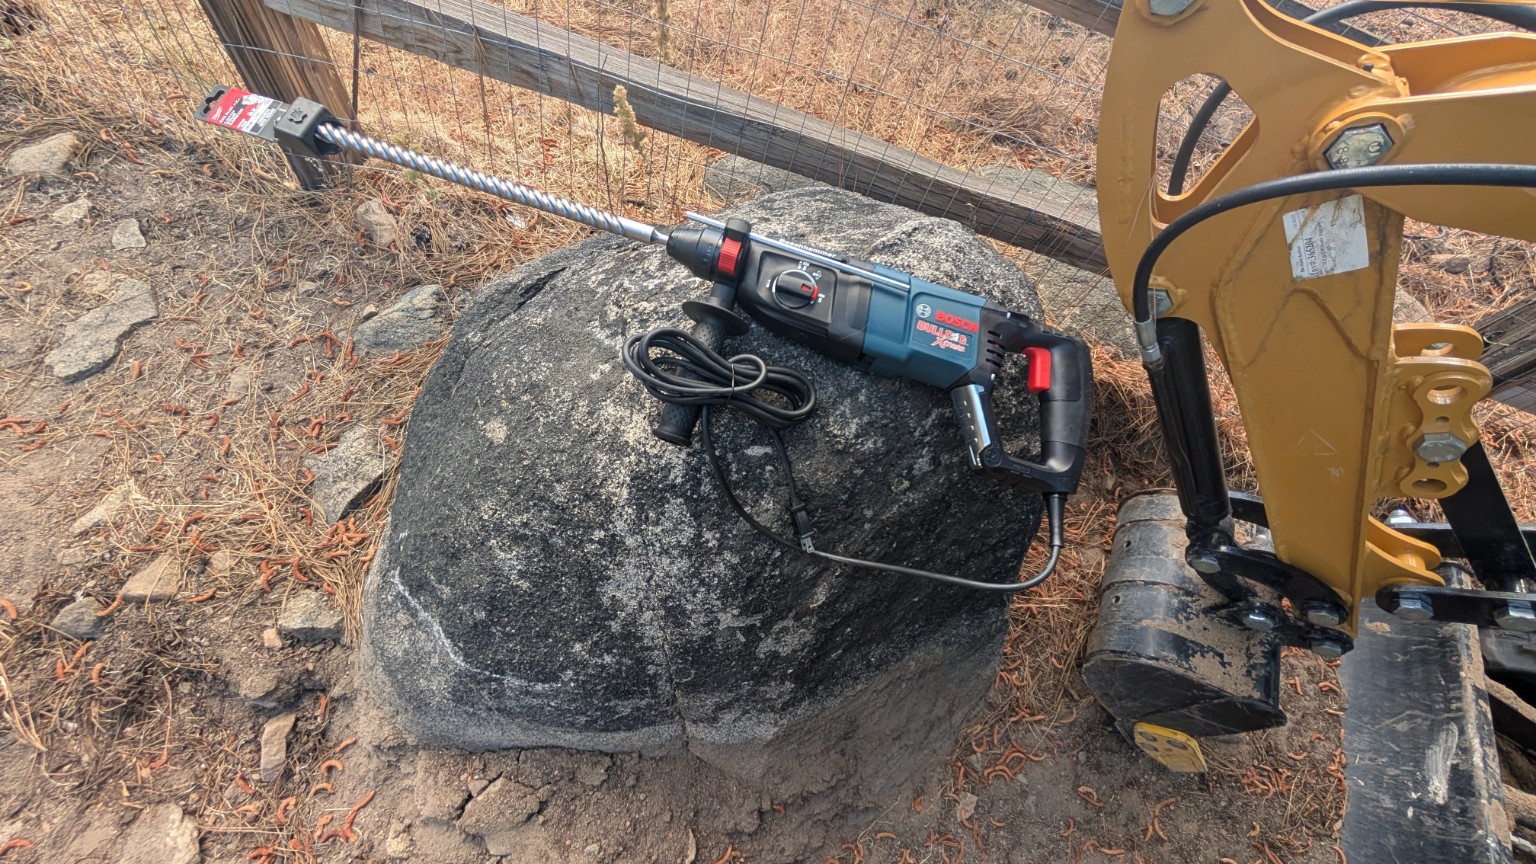
The drilling pattern
Follow the seam
I marked a line across the top that tracked the visible fracture instead of forcing a ruler-straight path.
Drill five deep holes
Each hole was 3/4 inch in diameter and roughly 18 inches deep, spaced five to six inches center-to-center.
Clear dust and manage heat
Each hole took about ten minutes including breaks. I backed the bit out regularly to evacuate granite dust and gave the tool time to cool.
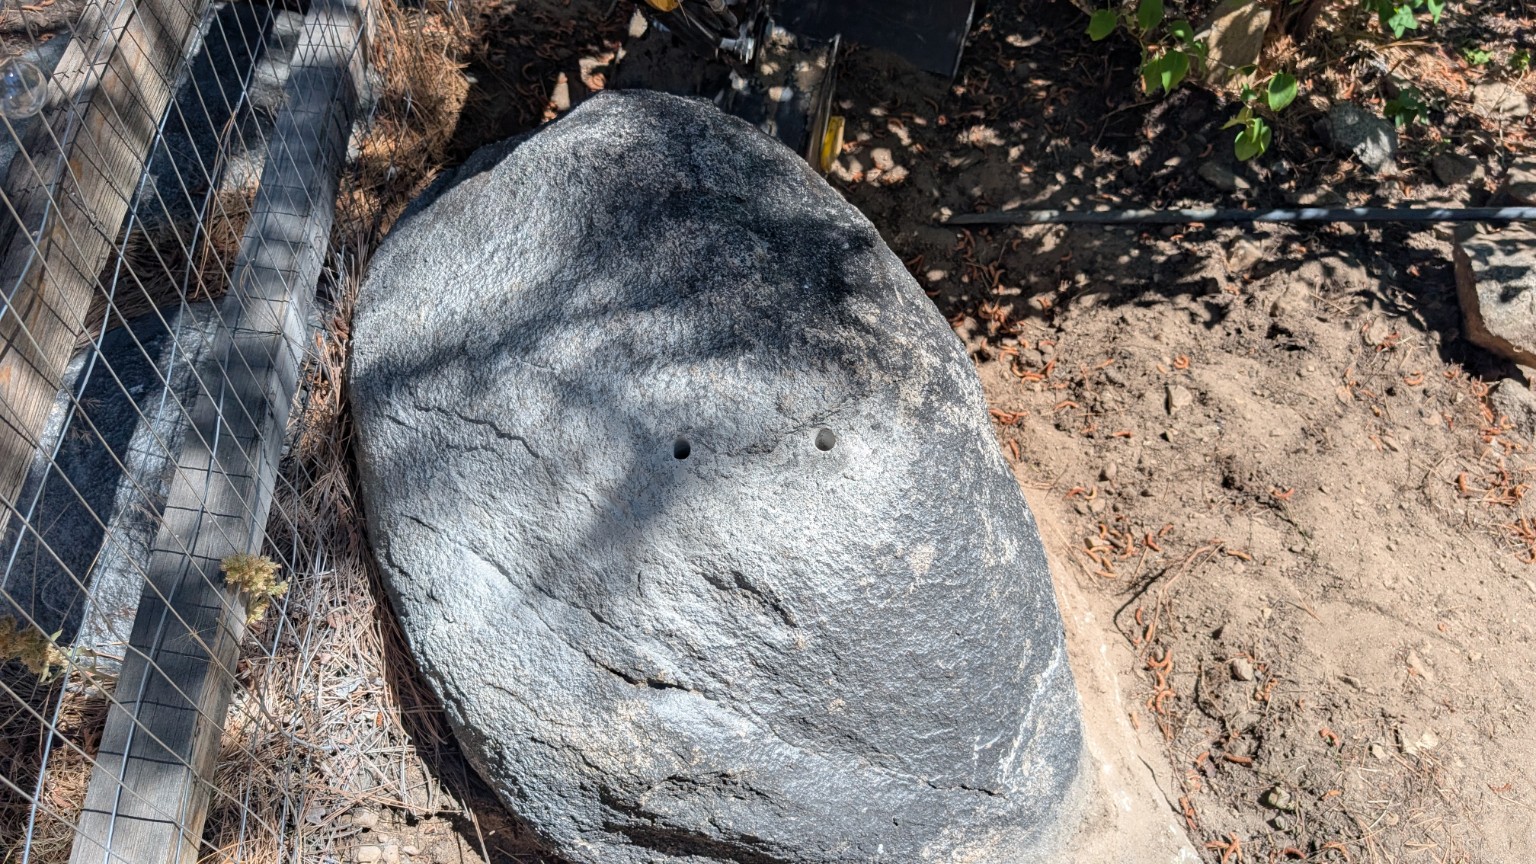
The nonstandard part
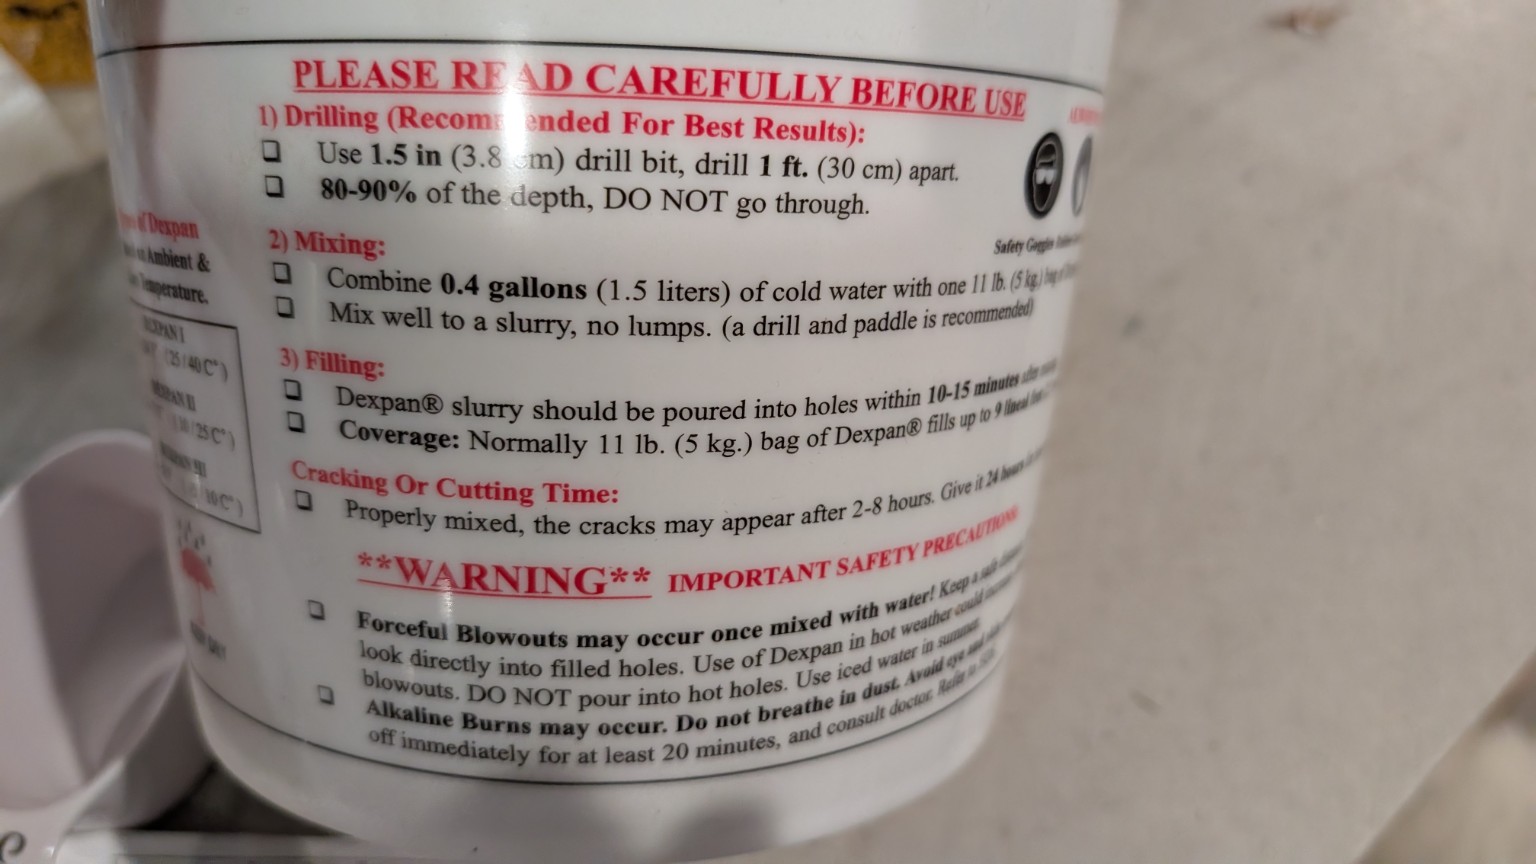
Dexpan's label recommends 1.5-inch holes spaced about a foot apart. My SDS-Plus setup produced 3/4-inch holes at roughly half that spacing. The trade: less grout volume in each hole, but more pressure points, greater depth, and alignment with a natural fracture. I was betting that geometry would make up for what the narrower holes gave away in raw expansion force.
Mixing the chemistry
The five holes together held only about 0.69 liters, so mixing the entire 11-pound pail would have produced far too much slurry. I scaled the powder and water down together, holding the exact ratio from the label. The Makita and paddle removed the lumps, and the mix went straight through a funnel into the holes — expansive grout starts working on its own schedule, not yours.
Then I went to bed
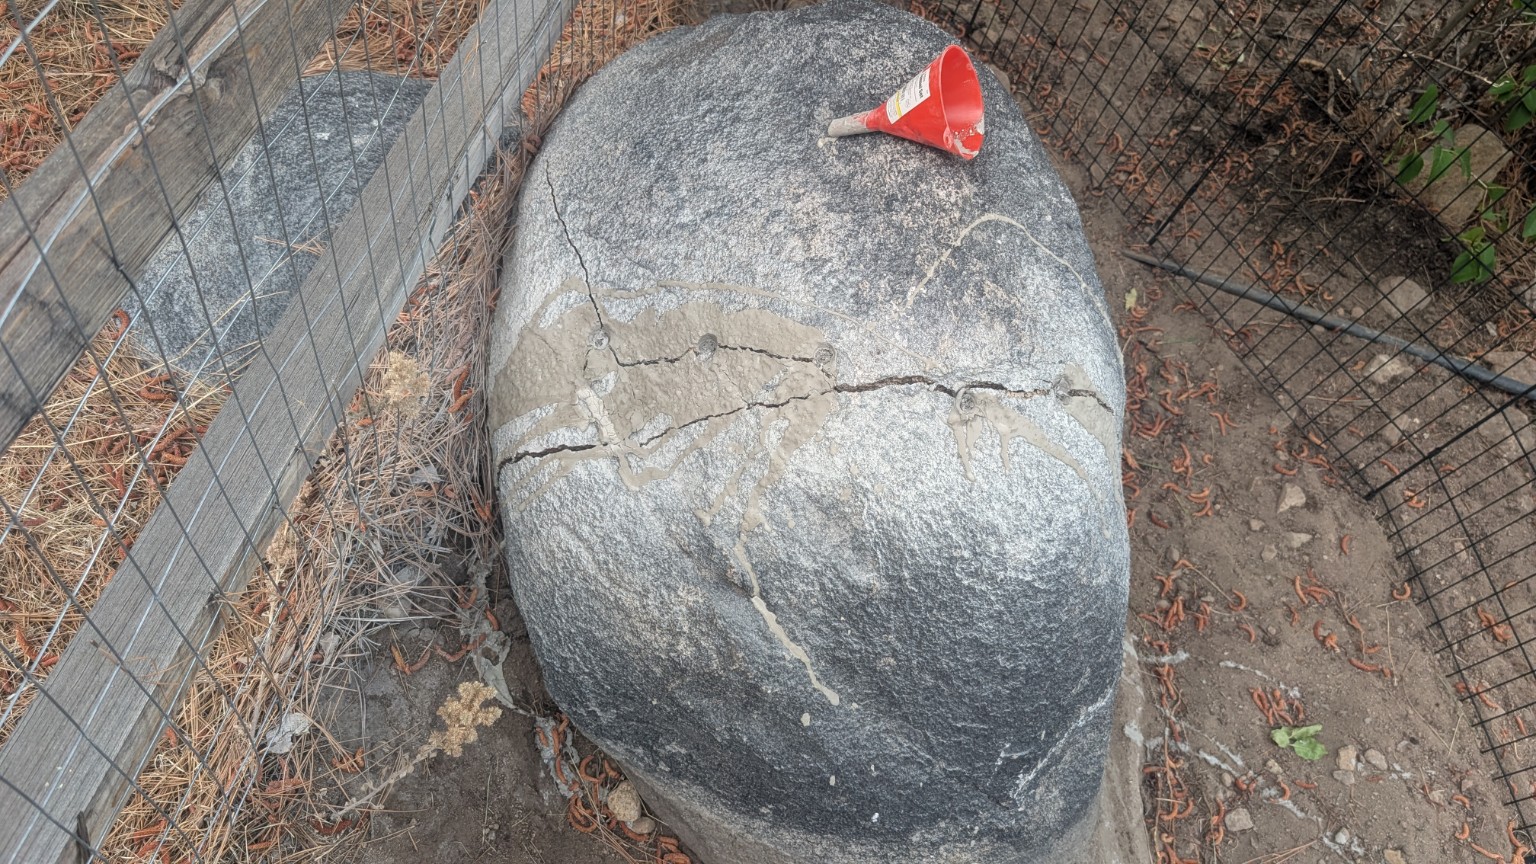
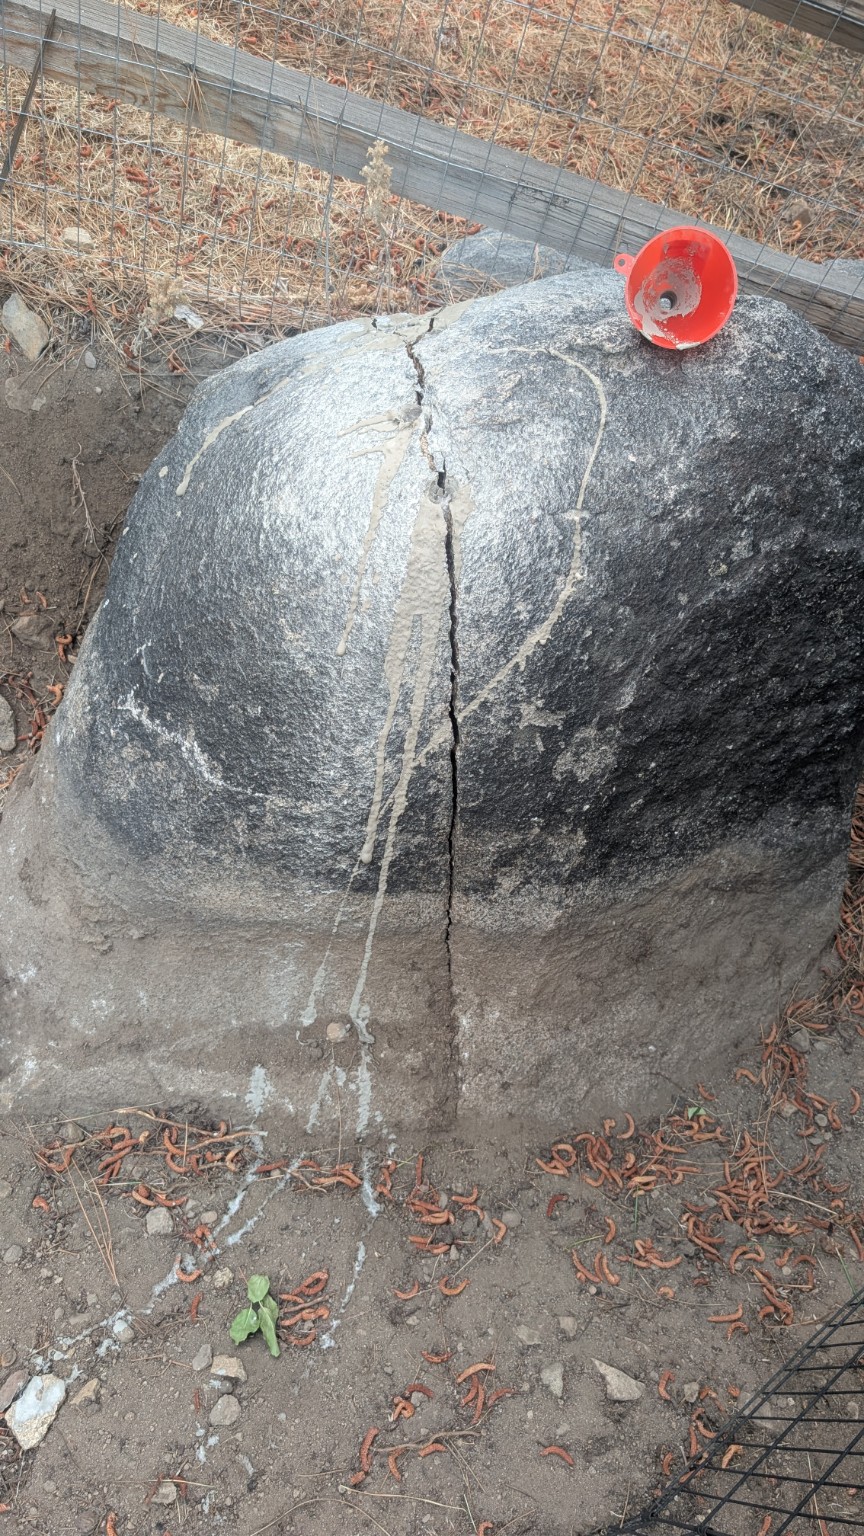
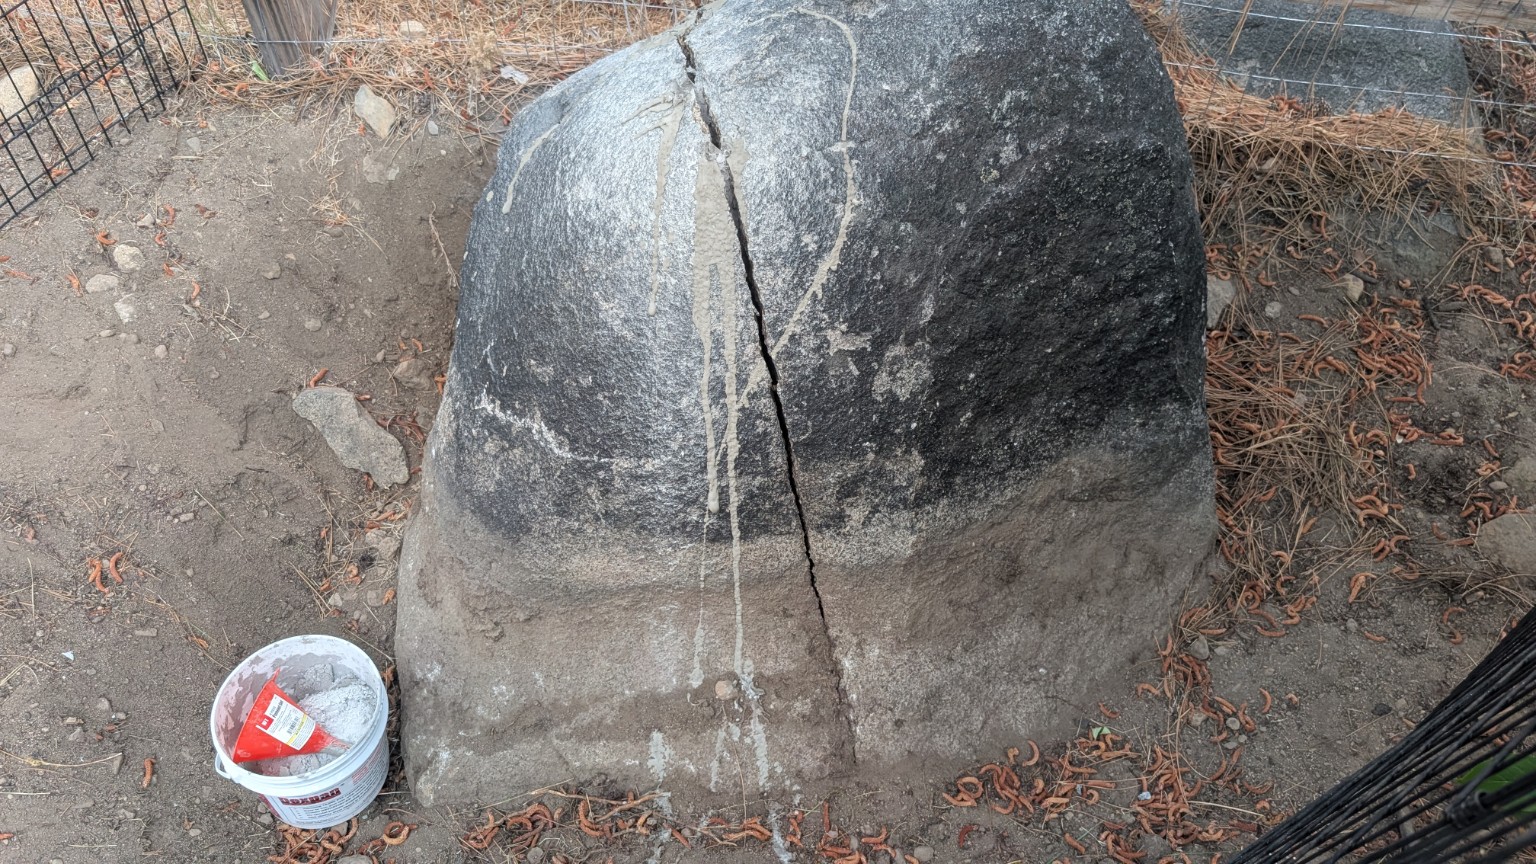
I poured the holes in the evening and walked away. That is the strangest part of this method: the most productive hours of the project happened while I was asleep. By roughly eight hours later, a full crack had formed. It kept widening through the following day as the grout continued to expand.
 Before
After
Before
After
First try
The holes connected. The crack followed the chosen line. It propagated down the face. A boulder the excavator could not comfortably control as one piece was now ready to become two.
What I would change
The method worked on the first attempt, but not everything was optimal. A larger-diameter bit closer to the label's 1.5-inch spec would have held more grout per hole and likely cracked the stone faster. Pre-staging the funnel, water, and measured powder before mixing would have removed the small scramble once the slurry was live. And I would mark the drill bit with tape at target depth from the start — eyeballing 18 inches is a good way to get 14.
What happens next
The next chapter is mechanical: give the grout time to finish, excavate around the base, use the bucket to open the fracture, and reposition each half without suspending more weight than the machine can safely control. That becomes Field Note 002.
The exact toolkit
Bosch Bulldog 11255VSR
Corded SDS-Plus rotary hammer used to drill the granite.
Milwaukee MX4 3/4 × 18 in. SDS-Plus Bit
Four-cutter solid-carbide masonry bit used for the five deep holes.
Dexpan Type 2 — 11 lb.
Expansive demolition grout selected for the rock-temperature range.
Makita Drill + Mixing Paddle
Blended the measured grout and water lump-free in a clean five-gallon bucket.
Wide-Mouth Funnel
Made the 3/4-inch holes easier to fill cleanly with live slurry.
Eye, Hearing, Dust & Skin Protection
Safety glasses, hearing protection, suitable dust protection, gloves, and long sleeves. Non-negotiable with alkaline grout.
Learn. Build. Explore.
Alpine Development Labs exists at the overlap of software, construction, machines, and experimentation. This project used a compact excavator, power tools, simple geometry, and material chemistry to solve one physical problem. The same method applies everywhere: observe the system, measure what matters, choose the right leverage, and document what actually happened.